Gauntlet2D
Unreal Port P5: What's on the Menu?
Introduction:
If you haven't read any of my other posts and are curious about what I'm doing you can check them out here:
- Unreal Port P1: Textures and Tiles and Flipbooks, Oh My!! - Project setup/importing and setting up textures, sprites, and tiles.
- Unreal Port P2: Keep it moving! - Setting character movement and Animation Blueprints.
- Unreal Port P3: It's Alive! - Creating the Enemy and implementing combat between the player and the enemy.
- Unreal Port P4: Full Circle - Finishing up the gameplay loop with pickups, keeping score, and spawning enemies/pickups
This post will be about setting up the User Interface and the Main Menu.
Disclaimer: I'm fairly new Unreal and have only been learning game dev for about a year now so there may actually be easier solutions to problems I document. Feel free to let me know so that I can continue to learn!
Player HUD:
The Player HUD should show the Players current health and score at all times. Currently that's done through console logs but the goal here was to set up the player HUD to show these things to the player like I did in my Unity game. The Steps to set up the Player HUD:
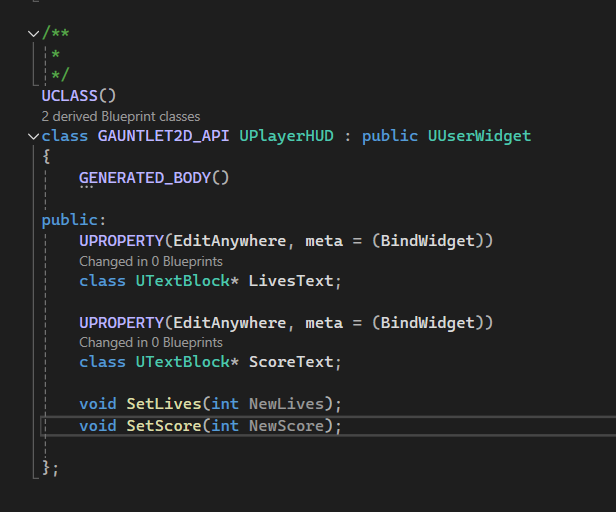
- Created a C++ class that inherited from the UserWidget class.
- Add the score and lives Textblock variables plus the functions to set the text, making sure to bind the variables to the widget.
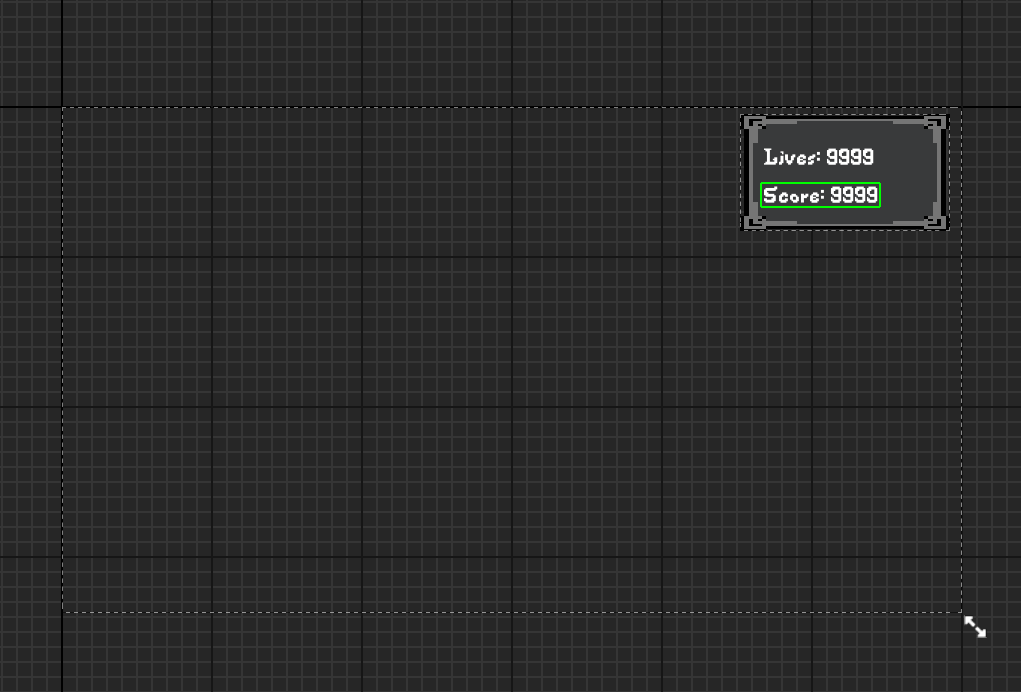
- Created a Blueprint based on the new PlayerHUD class and editing blueprint widget in the designer to get the look and feel of the Unity game.
- Set PlayerCharacter class up with the widget to display on begin play and to update the text in the proper functions (The player's Die Function, PickupItem Function, and the OnEnemyDied function in the spawner where score is updated).
This wasn't too difficult to set up, the header file shows how simple it actually was:
All the customization happened in the Blueprint widget designer. I won't go into too much detail here as it's mostly going back and forth between my Unity game and the editor to make sure they match:
After creating the Blueprint I added 2 variables to the PlayerCharacter class:
- TSubclassOf<class UPlayerHUD> PlayerHUDClass - Used to populate the PlayerHUDWidget variable.
- class UPlayerHUD* PlayerHUDWidget - used to actually call PlayerHUDWidget functions.
These are set up and shown to the player in begin play:
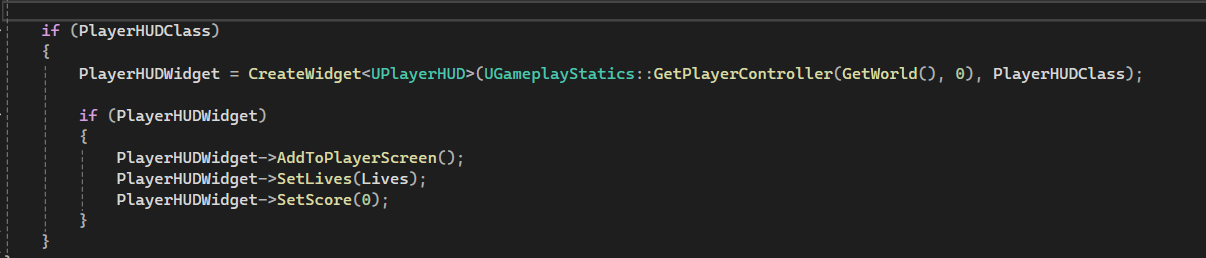
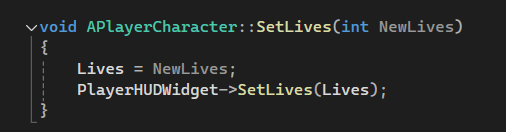
Then called in the relevant functions such as SetLives:
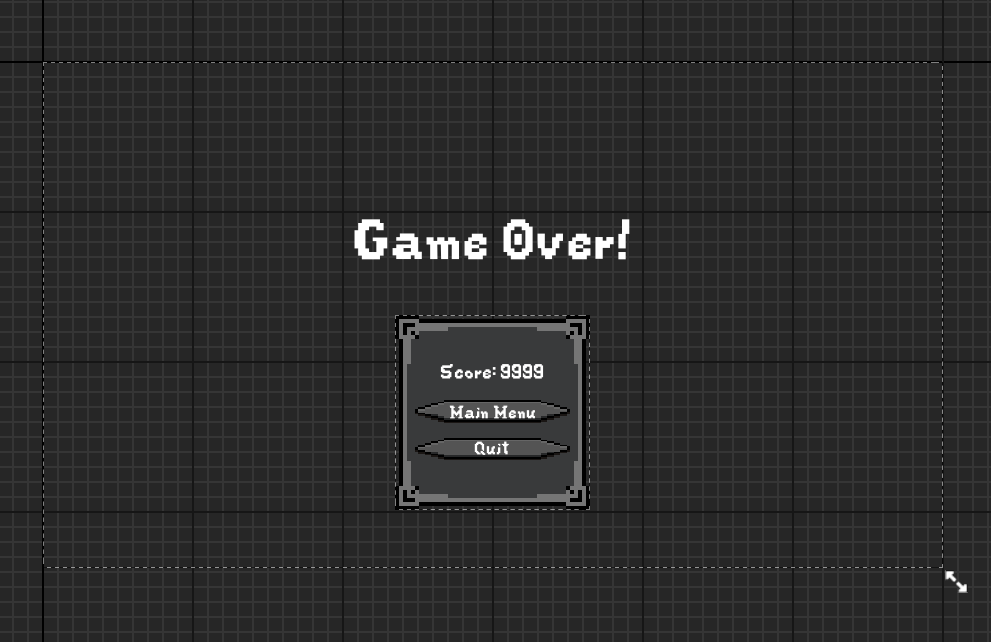
Game Over Screen:
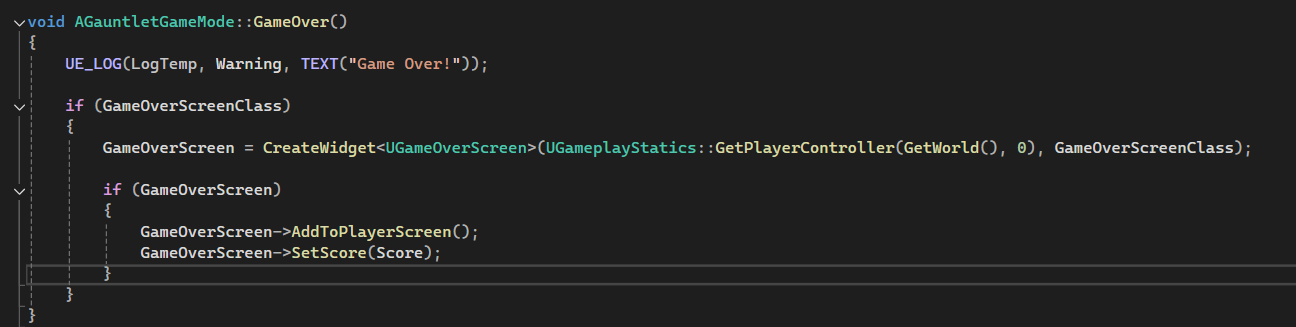
The game over screen is similar to the PlayerHUD but slightly simpler. It lives in the Game Mode class where the GameOver function is called. Steps for setting up the GameOver Screen.
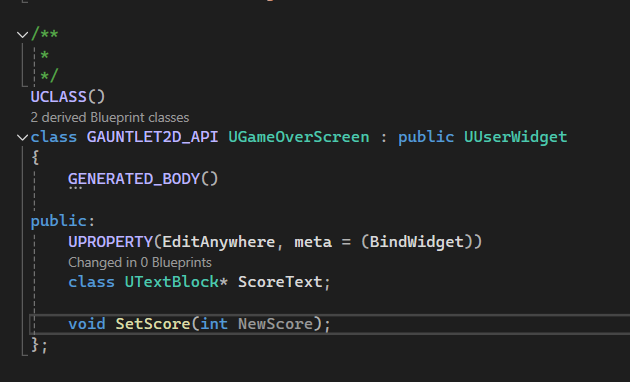
- Created a GameOverScreen class that inherited from the UserWidget class.
- Added score variable textblock and set score text functions plus binding the score to the widget.
- Created a Blueprint based on the GameOverScreen class and editing it to get the look and feel of the unity game.
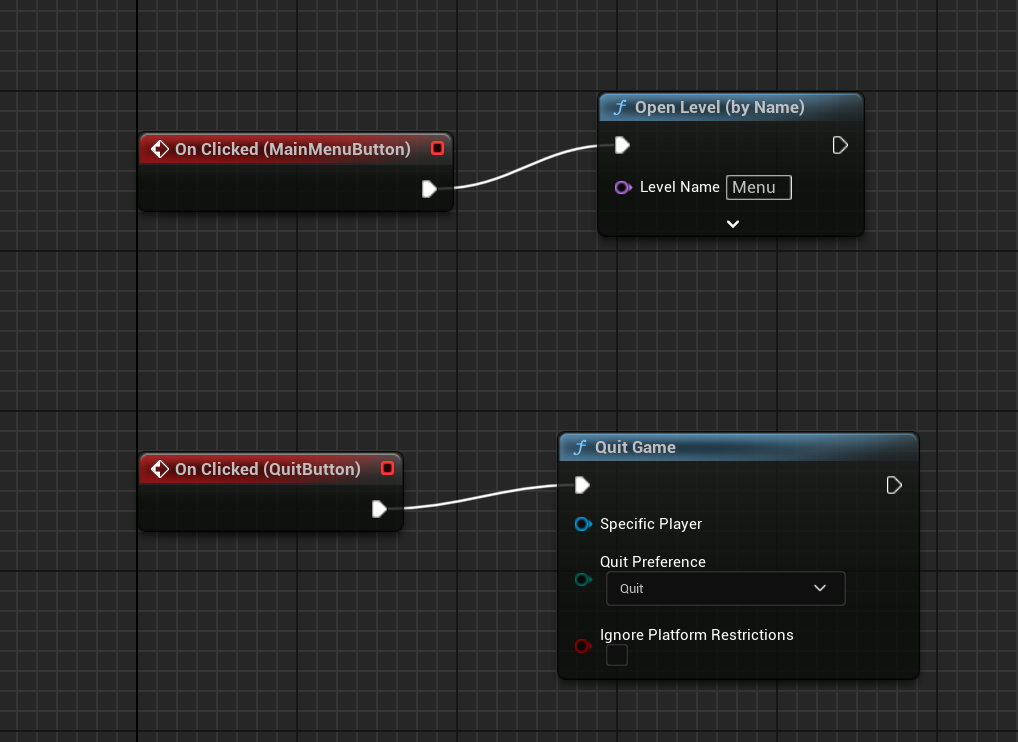
- Make sure the button events open the main menu (more on that below) and quit the game depending on which button the user pressed.
- Set the GauntletGameMode class up with the widget to display when the GameOver function is called.
I'll go into even less detail here since the GameOverScreen set up is almost identical to the PlayerHUD. The only differences are where they are set up and called really, though I'll talk a little bit about setting up the buttons.
Setting up the buttons:
- Getting them to look the way I wanted
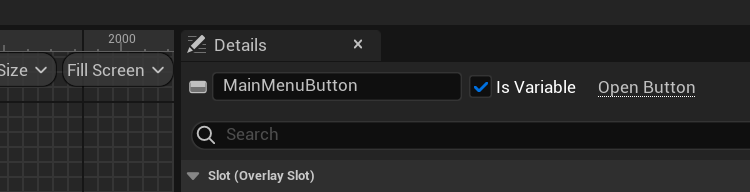
- I had to check the "Is Variable" Checkboxes for each of them which gave me access to the onclick events in the event graph.
- Finally, set up the onclick events to open levels or quit the game depending on what is clicked.
Main Menu:
The Main menu was the hardest part of the UI to set up. The Menu has its own level and loads the MainLevel (where all the gameplay happens) if the player clicks start. The hard part here was getting it to look and feel like my Unity game because that version had an animated image as the background. By default, you can't use a flipbook (or I can't find a way to at least) in a user widget. I found a great tutorial on how to get it done though. The steps in creating the main menu:
- Create a new level called Menu.
- Create a new Blueprint based on Userwidget (no need to create a new C++ class I did all the functionality in the event graph here)
- Edit the blueprint to match the look and feel of the Unity game (Animated background was the pain point here).
- Make sure the button events open the main level and quit the game depending on which button the user pressed.
A lot of this is similar to the above so I'll just focus on the pain points/issues.
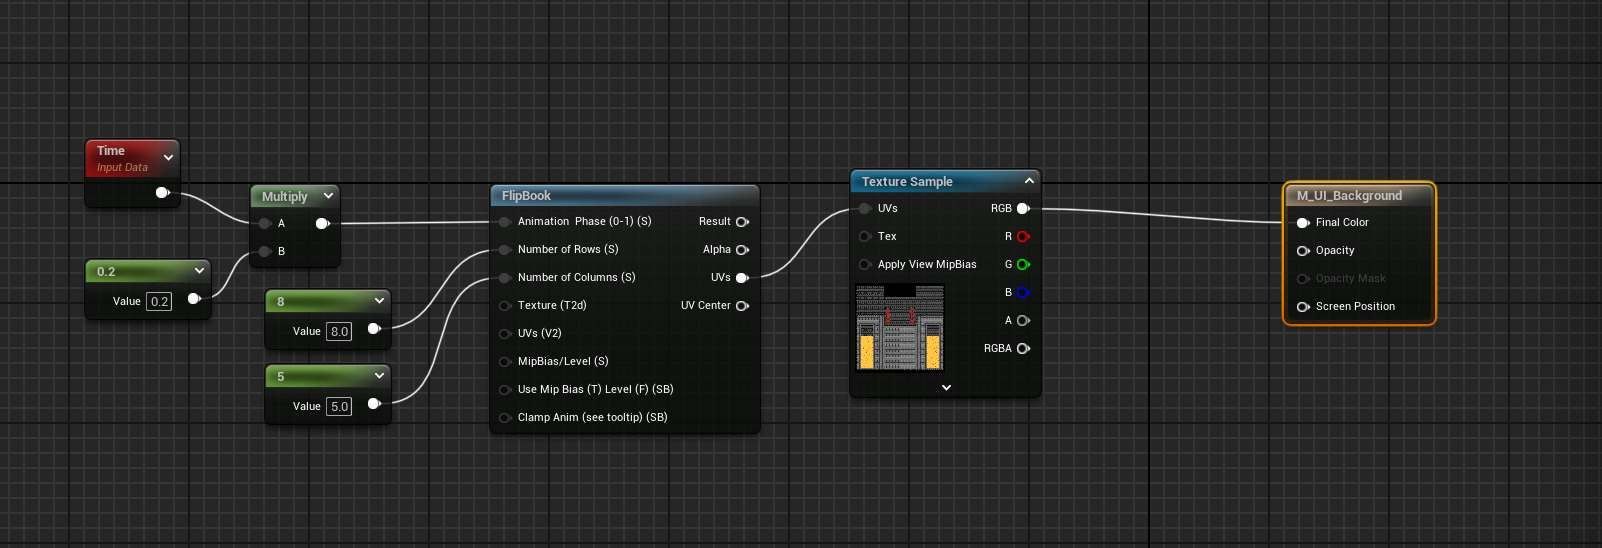
For one, using a flipbook in a userwidget requires a unique approach. The actual steps are slightly involved and would take a long time to detail, and they aren't even mine. So, here's the tutorial I used:
The method basically involves creating a material and changing its setting in the Material Graph to use the flipbook. Once the material is set up properly you can just use it in the image widget like any other image. There are some extra settings I added to slow down the animation to where I wanted it. Here are the Material settings I used: 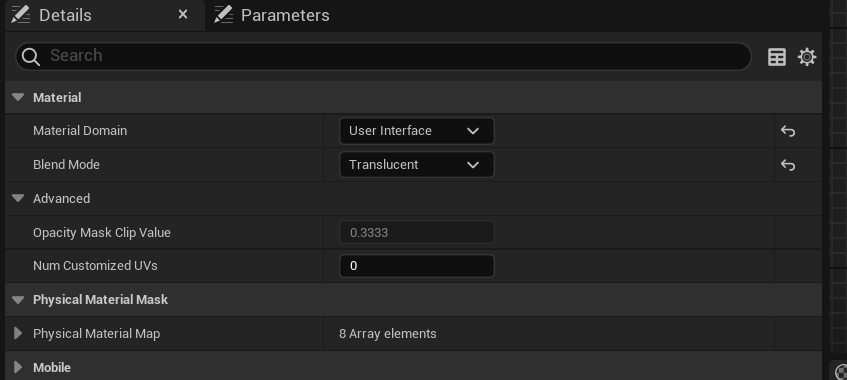
The final issue I had was that even though I didn't have a player start actor in the main menu screen it still spawned the player in the world. I'll admit that I was ready to move on when this issue came up, so I did the bare minimum to fix it. I'm sure there are better ways but here's what I did.
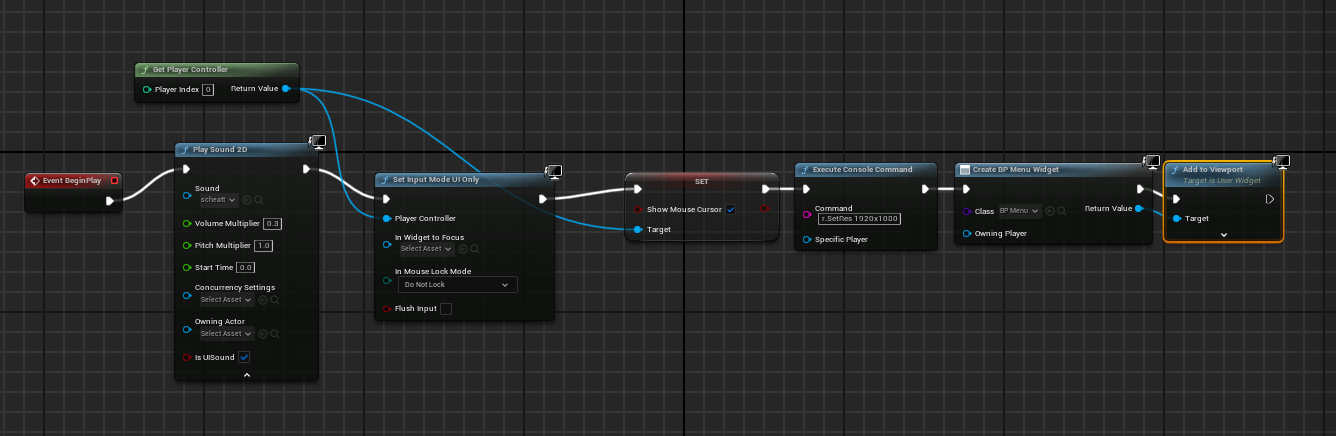
- In the MainMenu level Blueprint I disabled player input and enabled the mouse so that the user could interact with the Menu.
- That's it, lol.
So that means that behind the UI a player is spawned and is just hanging out behind the user widget. This may not be ideal, but it seems to work fine. I was already handling some other stuff like starting the music and setting the resolution in the level blueprint editor anyway, so it didn't take much to do.
Conclusion:
With the UI complete the game feels 98% there. The last thing to do is some final polish like adding fade ins/outs, add the opening text, and make some adjustments so that the game feels like the original. I think I will end up doing a final blog post about that!
Until next time!
Leave a comment
Log in with itch.io to leave a comment.