Gauntlet2D
Unreal Port P2: Keep it moving!
Introduction:
If you haven't read my first post and am curious about what I'm doing, and my project set up:
This post will be about how I am currently handling movement for the player (I can always refactor if things change).
Disclaimer: I'm fairly new Unreal and have only been learning game dev for about a year now so there may actually be easier solutions to problems I document. Feel free to let me know so that I can continue to learn!
Player Character Blueprint:
From what I can see, Unreal doesn't support Animation state machines and anim graphs for 2D game development with its default 2D plug in, Paper2D. That's a shame, but luckily, we have a third-party plug in: PaperZD that give us access to 3 important things:
- Animation Sequences: These handles how a particular animation plays and other things like Notifies (used to doing things at specific frames within an animation like sound) and similarly NotifyStates (I'll be using notifies for sound and to trigger attack functions in code later in the project)
- Animation Sources: Containers to group Animation Sequences and share them in blueprints (I'll be making an Animation source for the player and the enemy eventually, but as of this post I've only done the player so far).
- Animation Blueprints: This is where the magic happens! Similar to 3D development, you can create Animation State Machines that handle animations with various conditions for playing that would be complicated and feel convoluted if coded.
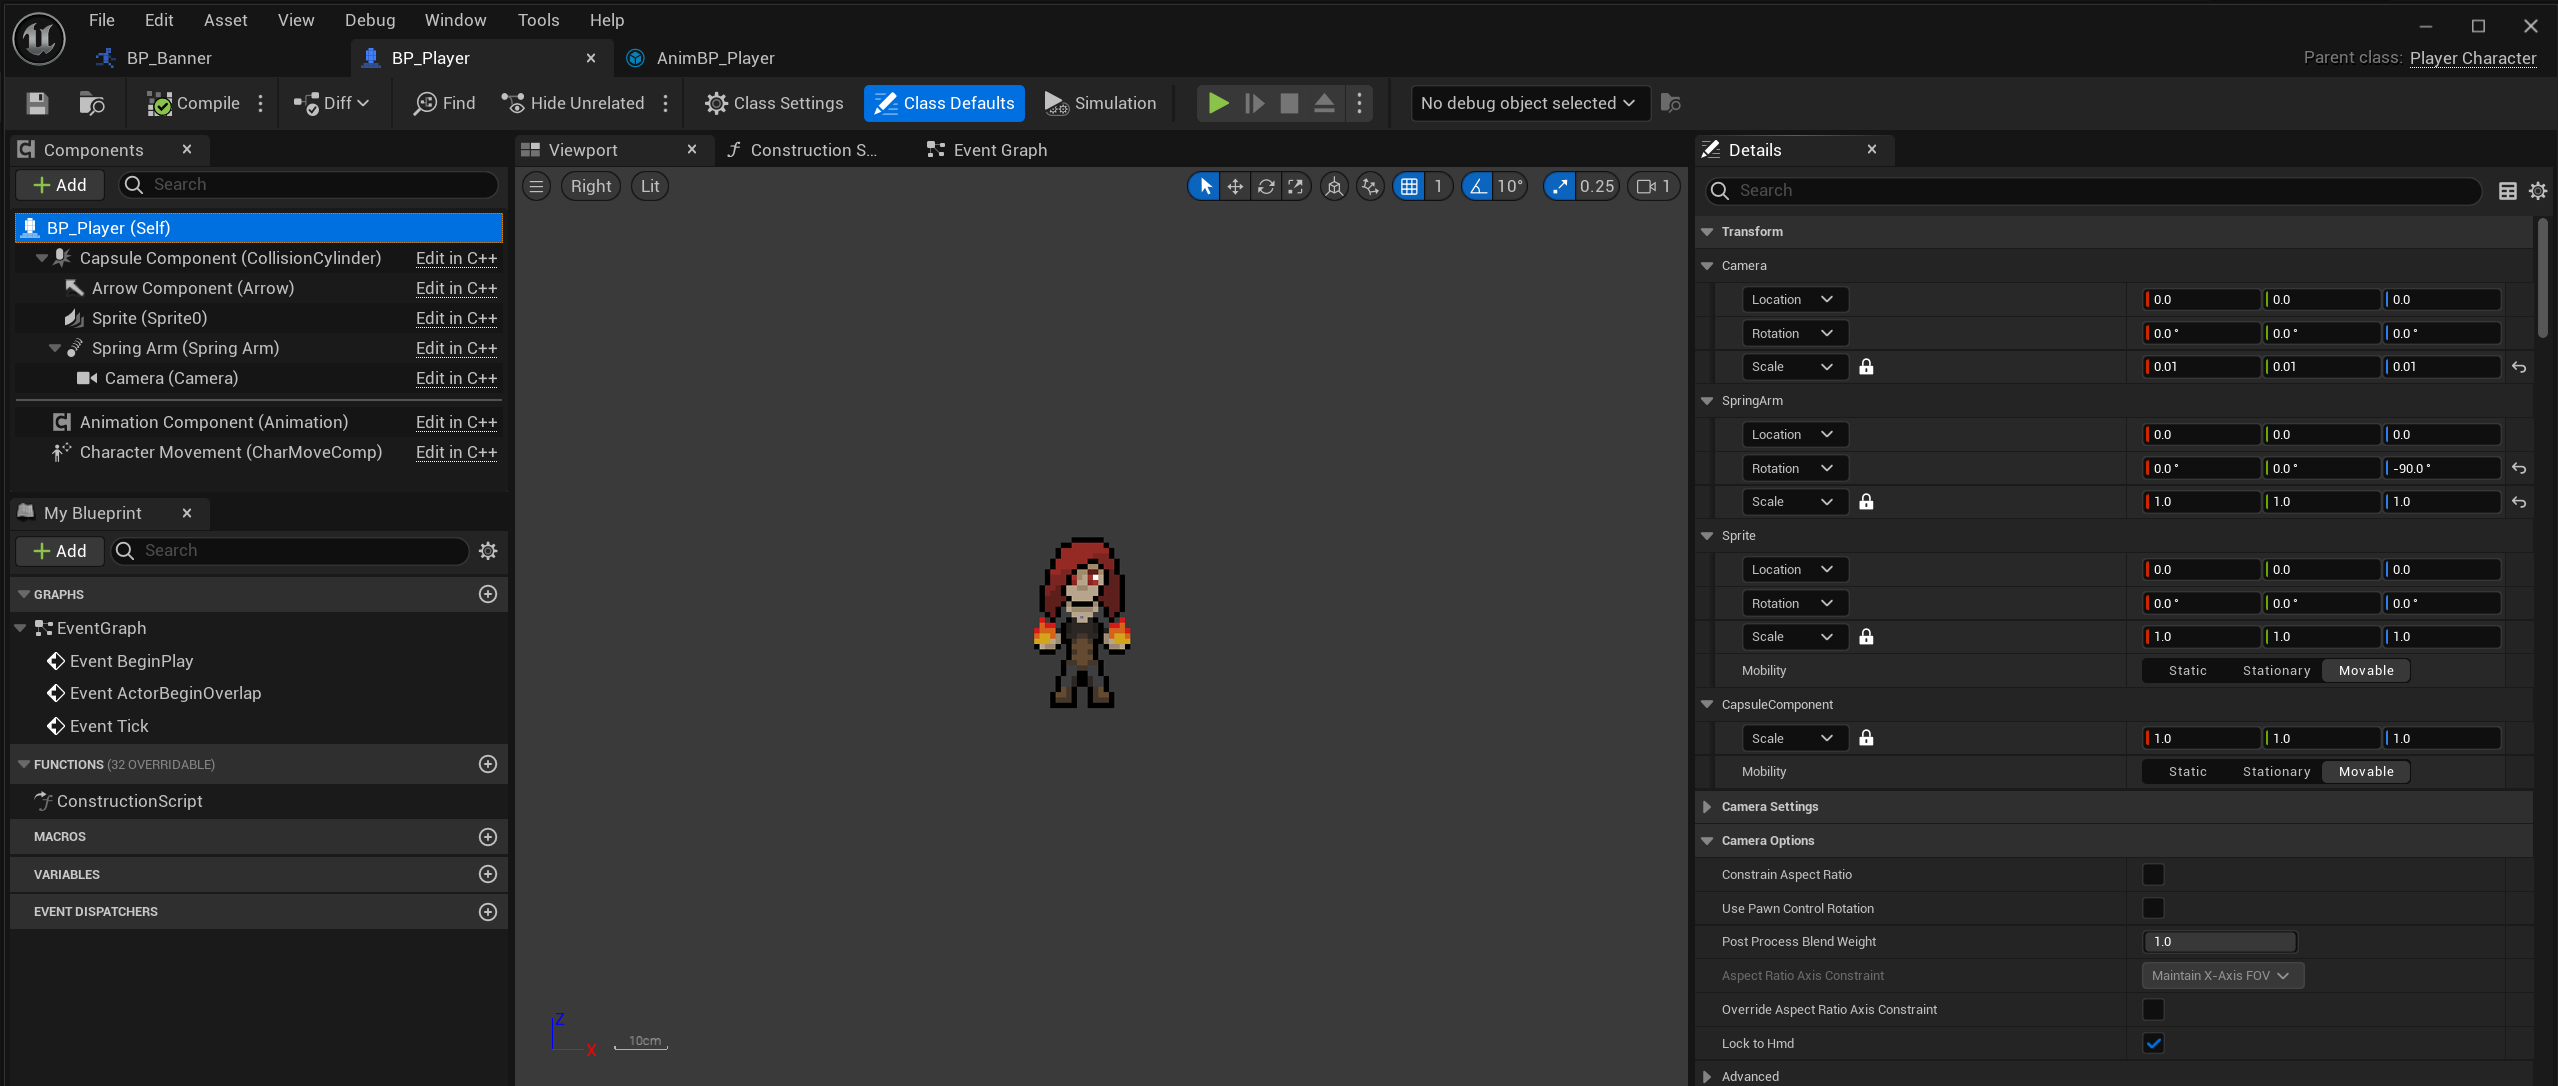
I simply created a new C++ class called Player Character that inherited from PaperZDCharacter. This gave me a Capsule Component, A flipbook component (PaperZD calls this sprite but it's a flipbook), and the character movement component (I decided not to use this because by default Gravity is handled on the Z axis and that causes big problems that I didn't want to deal with), and an Animation component (The big reason I wanted to inherit from PaperZD, this will controll what Flipbook "Sprite" will show). I also added a Spring Arm, attached it to the root, and added a Camera that I attached to the Spring Arm.
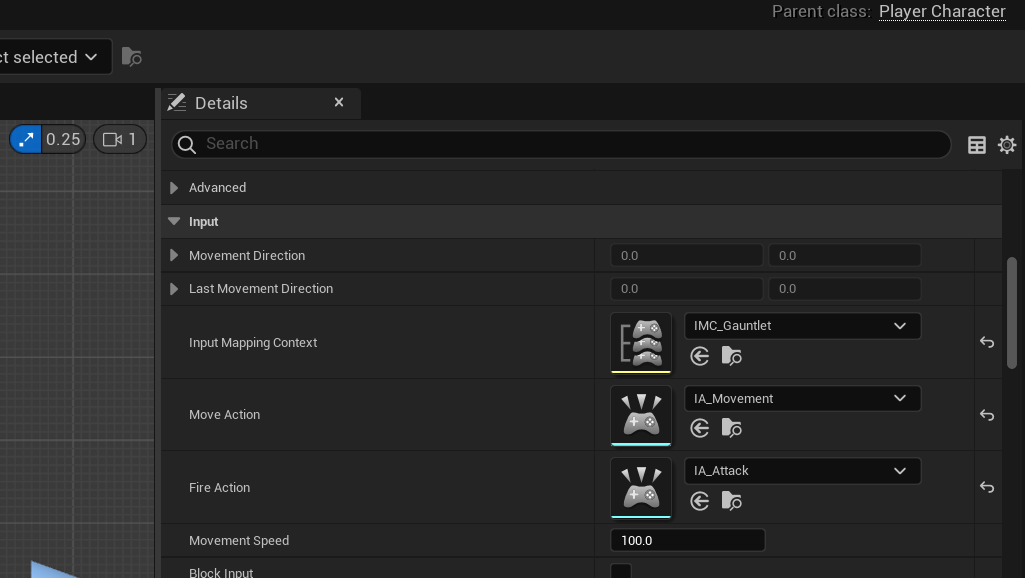
I then created a Blueprint based on the class, adjusted some default stuff like spring arm rotation, changing camera to Orthographic, removing gravity (who needs that?) and adding a default Flipbook. When all was said and done, I had a player blueprint that I could work with:
Input Setup:
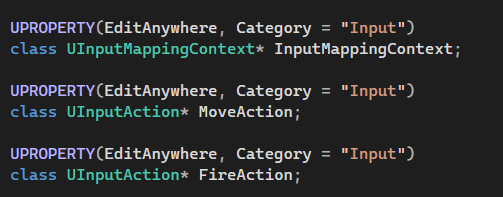
I used the enhanced input system which requires you to set up Input Actions (The actions I am going to use in game - I created a Movement and an Attack action) and a Mapping Context (Where I actually map those actions to the keyboard/joystick).
The process is basically:
- Create the Input Actions and Mapping context in the editor (right click menu had this in the Input section).
- Create Variables in my PlayerCharacter class to hold them in the player blueprint.
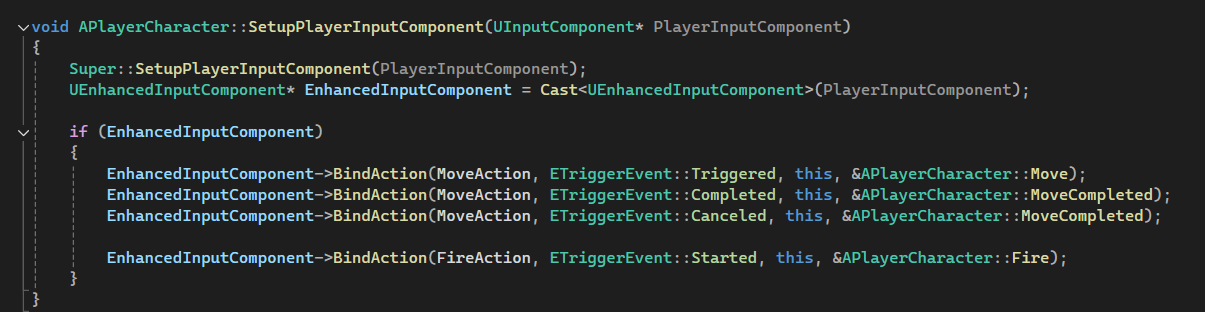
- Created the Functions I wanted to be triggered by input
- Bind those functions to the actions in code in the SetupPlayerInputComponent function
- Map the variables in the blueprint.
Movement:
Finally, I worked on coding movement. This was done in 3 functions:
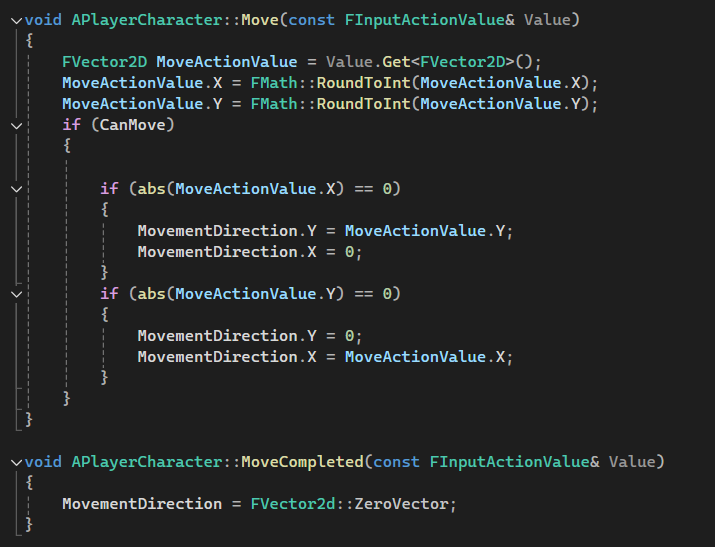
- Move: Handled all code that manipulated the Input action value and sent it to a variable called MovementDirection that's used in Tick. I had to manipulate the input values to get movement working exactly as it did in my Unity game. In Gauntlet, I wanted a classical feel, so I don't want diagonal movement and I want the player to move at the same speed no matter what.
- MovementCompleted: This just sets MovementDirection to a zero vector to cancel movement. I might also use it to trigger other things that should happen when movement ends in the future.
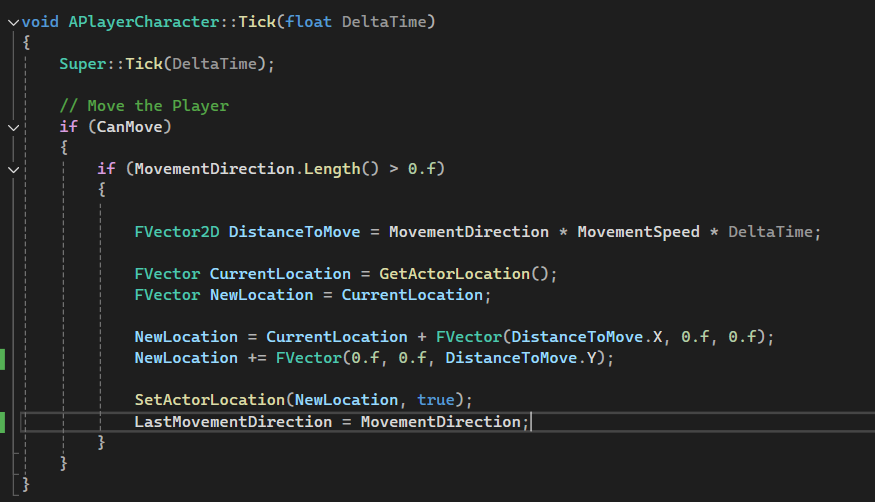
- Tick: Where I actually move the player. This involves translating the MovementDirection from a vector2d to a regular 3d vector and actually getting the distance I want to move using deltatime and a movement speed variable. I also save MovementDirection in a new variable called LastMoveDirection so that I know the last direction the player was facing for animations like Idle.
Animations:
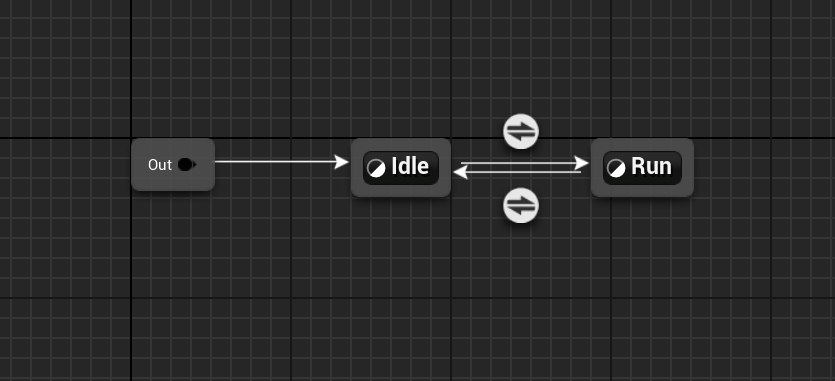
This really tripped me up! This was the first time I used PaperZD for a top-down game, so I created a new Animation source, created animation sequences for every single animation (including multiple ones for things idle, and attack because I wanted to account for movement direction), and finally created the animation blueprint. It's pretty simple so far with just idle and run states that check movement direction to switch between them.
Within each state though I had a rough time figuring out the logic for which animation to use depending on direction of the player. Below is what I initially set up:
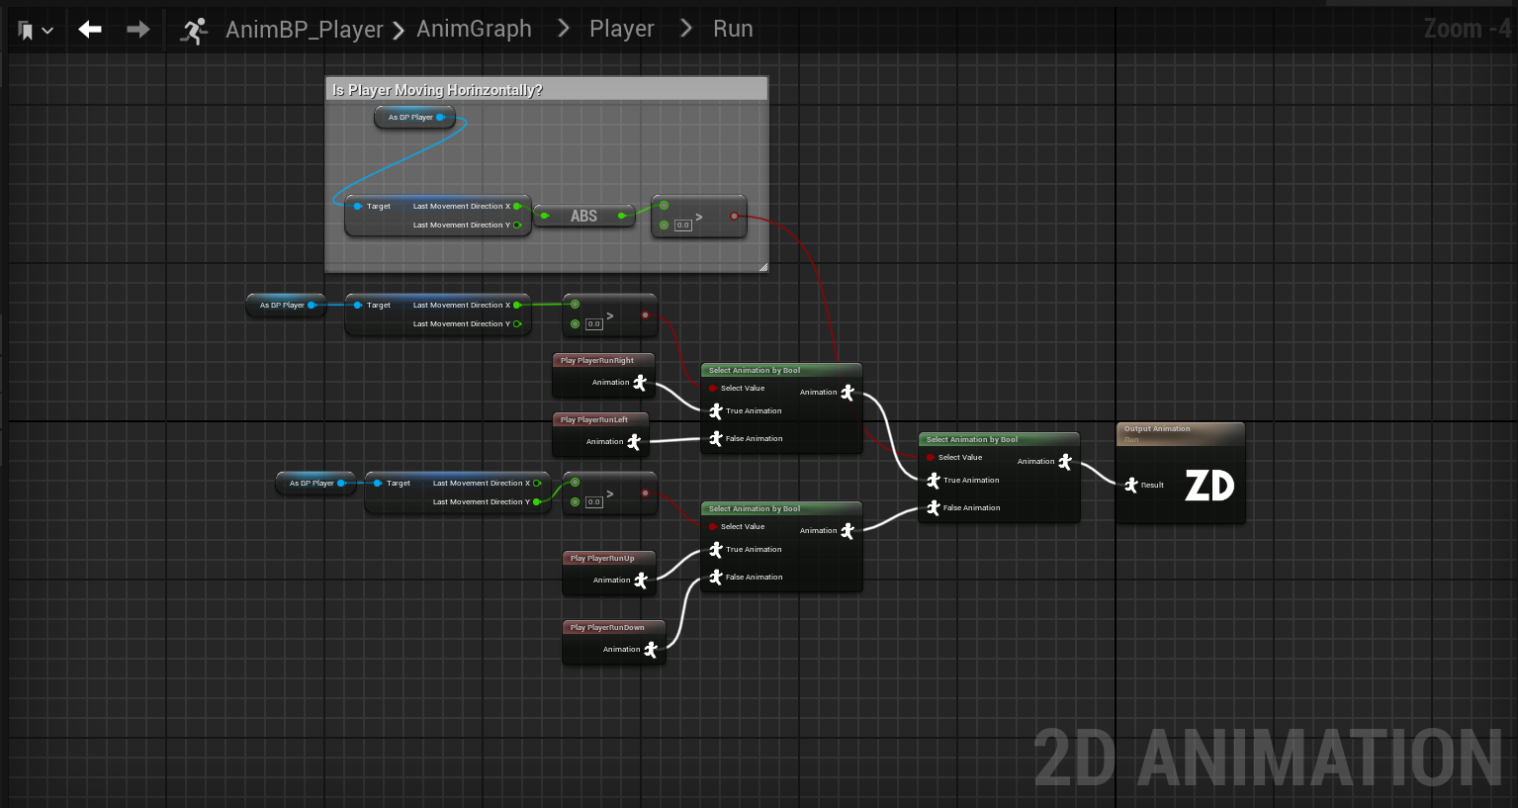
As you can see it's rather complicated for the task that's actually being completed. I figured there had to be a better way since PaperZD, as far as I could tell, did not support something like blend spaces. Turns out, there is! Instead of blend spaces, PaperZD allows you use multiple flipbooks for an animation in the Animation source using the "Multi-directional sequence" checkbox:
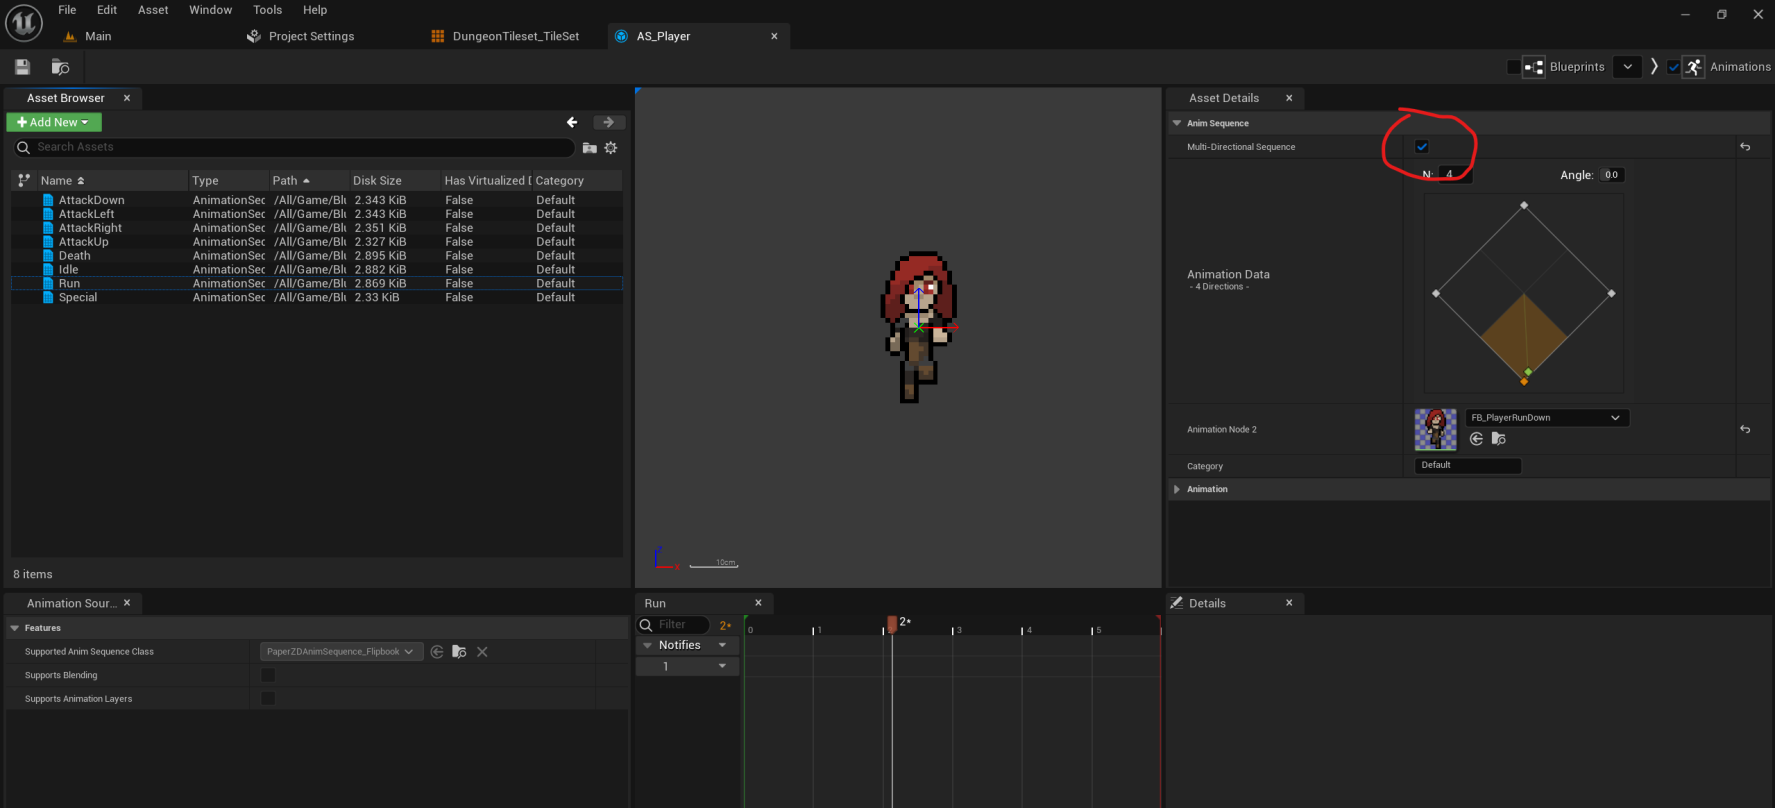
So, you check that, add your animations, add a "Set Directionality" Node in the animation state animgraph, and use whatever you want to control the state. The result is a much more elegant and readable solution:
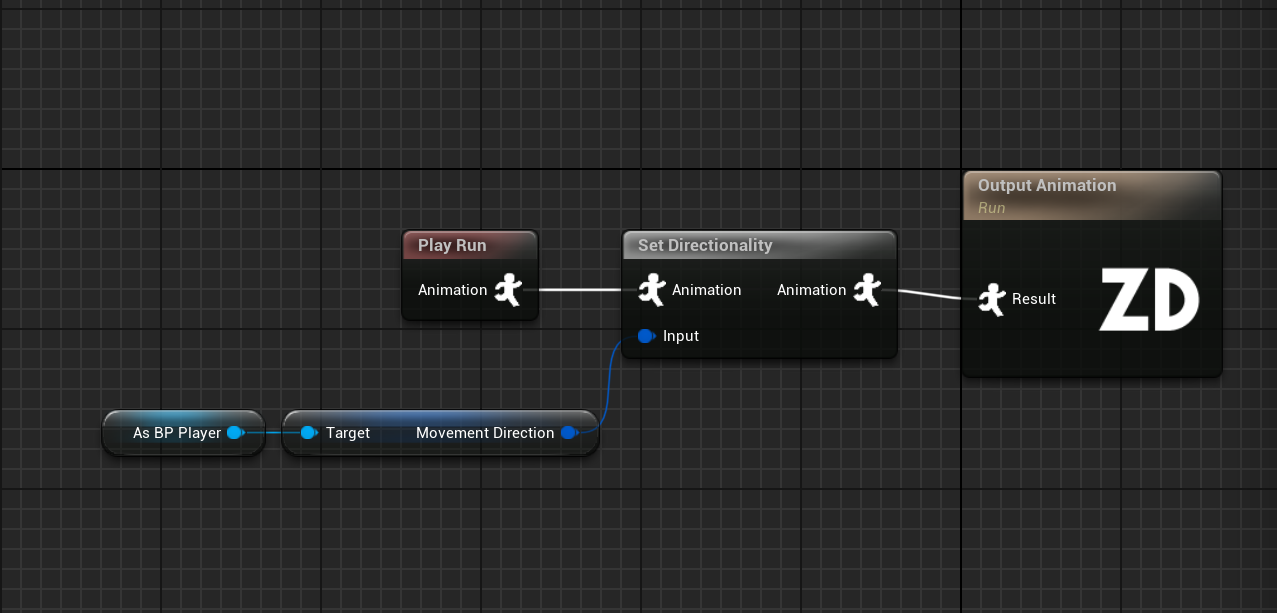
I couldn't figure how to use the multidirectional sequence for an animation override (what I want to use for the fire/attack state), so I had to keep the attack animations in separate directional sequences, but that wasn't too hard to code. Overall PaperZD made my life much easier!
Conclusion:
That was a whirlwind. I thought I was going to set it up one way, but due to some unforeseen complications I ended up doing something completely different! I learned a heck of a lot along the way though! Next, I think I'll tackle the enemy followed by projectiles and player/enemy interactions.
Comments
Log in with itch.io to leave a comment.
Hey Alexis!
As always amazing documentation!
You are inspiring me to do something similar too :0
About the animation and state machines, I would suggest blending into the fire animations the same way you did with the directional movement using PaperZD.
The outputs of the PaperZD directional node can be cached or linked.(You may even use a seperate Animation blueprint and then import-Link the pose into the "master" animation blueprint).
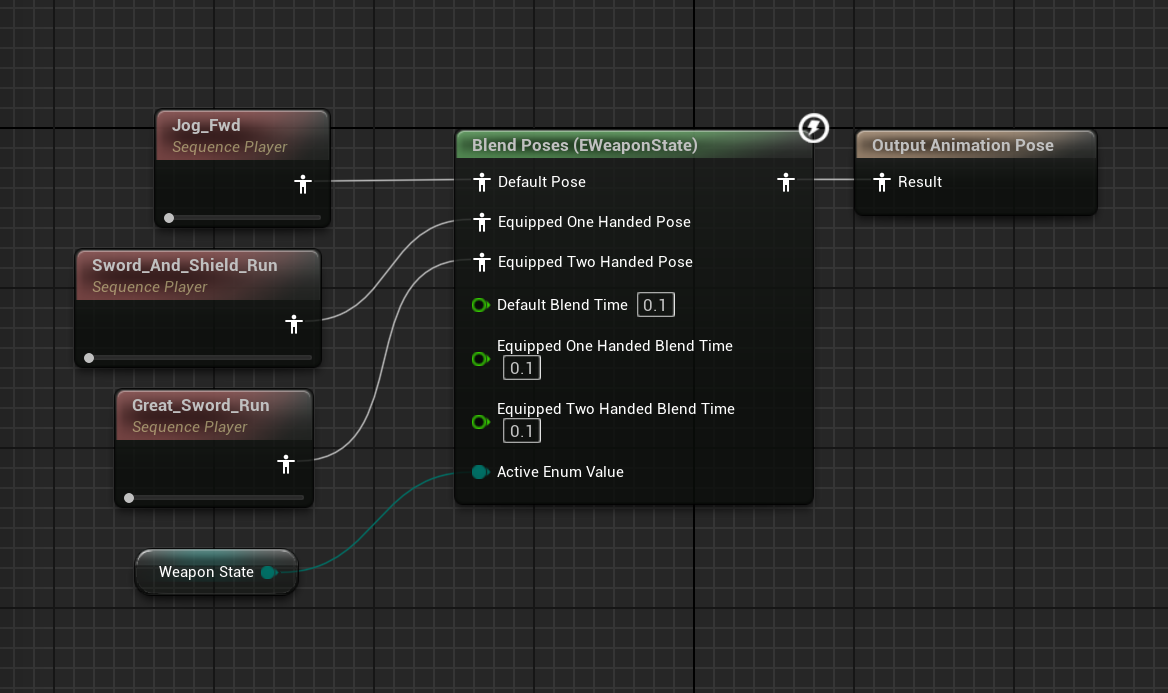
You can then create an Enum: States { Walking, Shooting}. And then depending on the state (which is already being handled by the PaperZD Directional selection of animation) you can blend using Blend by Enum(States).
Here I am using a Enum:WeaponState with {OneHanded, TwoHanded}.
We can "Link Pose" OR "Get Cached Pose" the outputs of the PaperZD directional node and replace the Animations in the screenshot with the PaperZD directional output)
Then choose to show walking or shooting depending on an Enum:CharacterState { Walking, Shooting}.
*Take my advice with limited liability, I have null knowledge in PaperZD and I'm still a noob in game-dev.
Also, Something small I heard about the C++ part, EpicGames decided that there will be a new syntax(and better optimiztion) for pointers.
It will be used more and more as the engine updates:
Normal C++: ClassName* MyPtr;
Unreal future proof: TObjectPtr<ClassName> MyPtr;
Thanks!
You totally should document your work; I've found it really helpful for retaining information.
Unfortunately, PaperZD does not support blend spaces as far as I can see =(. I do think that coding it using enums would make it much more readable though. Right now, I'm just using LastMovementDirection to choose which animation to play on the override:
Using Enums would make it much more readable, and I could probably even use a switch statement then too.
I also heard about the Ptr change. I have to get into the habit of using TObjectPtr<ClassName> MyPtr; but ClassName* is soooo much faster to type!